Yoga is the Sanskrit word for yoke, which means to “bring together.” The goal of yoga is to bring the body and mind together through breathing, meditation, and a series of poses called asanas with the intention of making you more self-aware as to what is going on both physically and mentally.
Yoga can also help reduce stress, relieve anxiety, improve sleep and flexibility, and help reduce the symptoms lower back pain. Chief among those areas of the body is the lower back.
Tips Before Beginning Yoga for Lower Back Pain Exercises
Before beginning any sort of exercise regimen, it’s a good idea to speak to a healthcare provider about your back pain first.
Be aware, however, that you should never feel pain in yoga. Instead, you should feel what’s called the “good hurt” or “going to your edge,” meaning you want to stretch yourself both physically and mentally to a place that might be outside your comfort zone but not so far outside that you ignore the warning bells going off in your head and your body screaming for you to stop.
Yoga is an exploration, meant to make you feel more relaxed and at ease within your own body, and that includes finding ease from your lower back pain.
Best Yoga Poses for Lower Back Pain
The following 9 poses are listed so they can be done in a sequence, with one pose flowing easily into the next:
1)Reclined Supine Twist
A reclined supine twist provides a great stretch if your lower back is tight. If you find the action of twisting places more strain on your back, stop doing the pose. Instead, you can lie comfortably on your back and draw both knees in toward the chest, giving yourself a stretch that way.
To perform the Reclined Supine Twist:
|
|
2)Cat/Cow Pose
Cat and Cow poses go hand-in-hand in most any yoga class. Usually performed early on in a sequence, they are often done to loosen and warm up the body before moving through more rigorous postures.
Both poses are wonderful in providing lower back pain relief, but cat pose feels especially great if you’re experiencing pain or feeling tight.
To perform this exercise:
|
|
4. Moving with your breath, perform both poses about five to seven times each. |
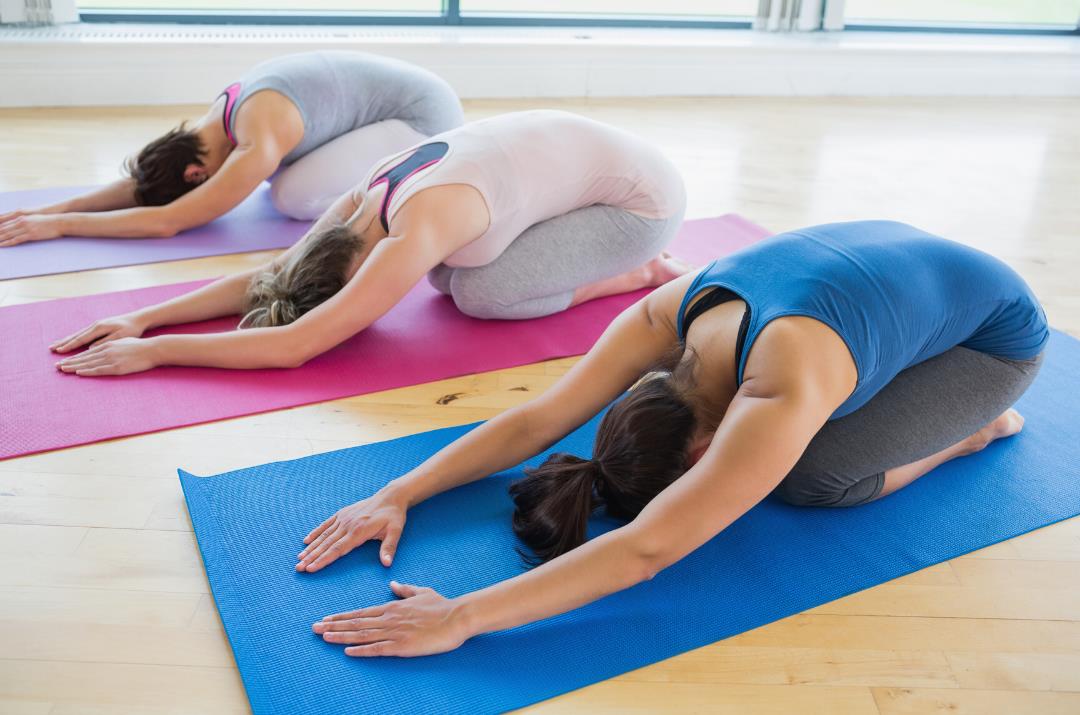
3)Child’s Pose
In yoga, child’s pose is considered a resting posture. If ever you’re feeling tired or need a break during a yoga class, you’re urged to drop into this pose, and the same can be said in your everyday life, especially if you need to give your lower back a break. It not only gives the low back a lovely stretch, but it also lengthens and decompresses the spine.
To perform this exercise:
|
|
4) Downward Dog
Downward-facing Dog is another yoga pose that’s considered a resting posture, but ask any beginner yogi, and they’ll beg to differ. This can be tiresome on your arms.
Regardless, Downward-facing Dog, or Down-dog, for short, is a wonderful posture that stretches the hamstrings, which can relieve pressure on the lower back, as well as elongates and decompresses the whole spine.
To perform this exercise:
|
|
|
5) Plank Pose
Plank pose is an excellent yoga pose for reducing lower back pain because it helps strengthen the core. This is another pose, however, to come out of immediately if you feel more back pain than when you started.
To perform this exercise:
|
6) Sphinx Pose
This is another pose that strengthens the core while bringing relief to the lower back.
To perform this exercise:
- Lower down onto your stomach and take your feet about hip-width apart to start.
- Bring the forearms onto the floor with your elbows directly underneath the shoulders, chest and crown of the head lifting toward the ceiling.
- If you feel any strain on the low back, take your legs out a little wider. If you still experience pain, come out of the pose entirely.
7) Standing Forward Bend
Standing Forward Bend is a simple posture that brings strength and flexibility to the spine, as well as releases any tension you may be holding in your low back.
To perform this exercise:
- Begin by standing upright, feet hip-width apart.
- Tuck the chin in toward the chest as you begin to roll all the way down into a forward fold position. Lift the tailbone toward the sky as you reach the crown of the head toward the tops of your feet.
- If your hands do not reach the ground, either bend your knees until they do or take one hand to opposite elbow, letting the weight of your head bring your body forward even more.
- Hold for five to seven breaths before slowly curling your way back up to standing.
8) Triangle Pose
This is another standing posture that can not only help relieve low back pain, but works to strengthen the core and the legs, while opening up the hips.
To perform this exercise:
|
|
9) Legs-Up Pose
Legs-up pose is the queen of all yoga poses because it helps bring relief from ailments, one of them being lower back pain. You can raise your legs in the air or lean them against a wall if you need support when you begin the pose. This pose is also great with a folded blanket (or two) placed under the low back.
To perform this exercise:
|
|
• Close your eyes and hang out in this pose for up to fifteen minutes. |


